
The W Trek or the W Circuit is arguably the most iconic hike in Patagonia—and for good reason! This famous hike, which snakes through Chile’s Torres del Paine National Park, passes ancient glaciers, electric blue alpine lakes, and impossibly jagged mountain peaks. While this hike is absolutely incredible, it’s not exactly the most straightforward to plan—there’s limited (and expensive!) accommodations along the trail, a confusing array of transportation options that you need to take to get to and from the park, and multiple variations of the hike that you can choose from, ranging from a three to four (or more!) night adventure.
My husband, Justin, and I have figured out the logistical challenges of planning a trip to Torres del Paine and recently successfully completed the trail. So if you’ve got your eyes set on hiking the W Trek in Patagonia, here’s everything you need to know about planning and executing your trip.

This post may contain affiliate links. If you make a purchase through them, we may receive a small commission, for which we are extremely grateful, at no extra cost to you.
About the W Trek
- Length: 45.7 miles (73.5 km)
- Elevation gain: 9,671 feet (2.948 meters)
- Difficulty: Challenging. It isn’t technically challenging and, except for a few long days that wrecked my feet, I personally didn’t really find it even super physically challenging. Still, you need to be in decent shape and have at least some experience hiking before tackling this trail.
- Days: The W Trek is typically completed as a hut-to-hut (or campsite to campsite) thru-hike over the course of four days and five nights, although some hikers opt to do it in less nights.
- Trail map
Where is the W Trek located?
The W Trek is located in the heart of Torres del Paine National Park, in the southern tip of Chile.
The closest reasonably sized town to the park is Puerto Natales, about an hour and 45 minutes south. While the town is not huge, Puerto Natales does have its own airport and plenty of hotels, restaurants, and outfitters to meet all your trekking needs.

Doing the W Trek Self-Guided vs. Going with a Guide
Before we dive into the nuts and bolts of planning a trip to Torres del Paine, it’s worth mentioning that, if you’re short on time or don’t want to worry about the logistical headaches of planning your experience on the W Trek, there’s plenty of tours that will do all the leg work for you.
For example, this tour is self-guided, but handles all of your accommodations, food, and transportation for you. Alternatively, this is a guided option, with transportation, food, and accommodations covered as well.
In full transparency, I definitely don’t think you need to go through a tour company to successfully plan and hike the W Trek. It’s generally pretty well-signed and there’s plenty of other people on the trail if you ever happen to get lost.
However, because accommodations are so limited and this trek can be logistically challenging to coordinate, it can be a bit of a pain and a time-suck to figure it all out. So, if you’ve got flexibility in your budget, you can have someone do it for you—plus, if you’re joined by a guide on the trail, you’ll be much more likely to learn about and spot the flora and fauna of Torres del Paine National Park (like the elusive puma!).
Not interested in doing a tour? Read on for everything you need to know about booking your own W trek!
Accommodations along the W Trek
The first and most complicated thing you need to figure out about booking your stay on the W Trek is where you’re going to stay.
There’s several campsites and refugios along the W Trek, but the most popular accommodation options are (if you’re hiking east to west):
- Night 1: Refugio Chileno
- Night 2: Refugio Cuernos
- Night 3: Refugio Paine Grande
- Night 4: Refugio Grey
If you want to hike the W Trek west to east, you would obviously reverse this itinerary.

Most of these refugios offer three types of accommodation offerings.
Shared dorm room
There are several rooms in each of the above referenced refugios (other than Chileno), where you can stay in a dorm-style room with bunk beds, with a sleeping bag or sheets, and a shared bathroom. These range in price from $43 USD per person per night at Refugio Grey, with just a basic sheet and blanket, to $207 USD per person per night at Refugio Cuernos (yup, it’s pricey!).
Equipped campsite
Alternatively, the refugios offer a fully equipped tent, complete with tent pads, sleeping bags, and pillows, so you don’t have to lug around your own camping equipment. These range in price from $158 USD for two people per night at Refugio Grey up to $300 USD for two people per night at Cuernos and Chileno.
Campsite
The most affordable option is to just get a campsite, using your own gear (either that you bring from home or rent in Puerto Natales). These range in price from $12 USD per person per night at Grey to $50 USD per person per night (based on double occupancy) at Cuernos and Chileno.

Booking accommodations for the W Trek
Accommodations along the W Trek become available for reservation in May or June of each year.
Because of their limited availability, they often book up for the busy Patagonian summer season (from December through February) within a few days of their release. I forgot to make a reservation for Refugio Grey until a few weeks after the reservations had been released and, unfortunately, it was all booked up (luckily, someone canceled a few days before my trip, so we were able to grab a reservation).

To get notified of the exact date each year, I’d recommend joining the newsletters of the two operators of the refugios, Las Torres Patagonia, which owns Refugios Chileno, Cuernos, Central, and Frances, and Vertice Travel, which owns Refugios Paine Grande and Grey.
Up until recently, you had to book reservations for these two operators through each of their own websites, which introduced some logistical challenges. For example, you’d have to confirm whether your dates were available for each of the accommodations on the operators’ separate websites and then book your accommodations, hoping that someone else doesn’t snag your desired bed or campsite at the other operator’s sites in the meantime.

Now, there’s a few third party operators that allow you to book all your reservations at once, like bookingpatagonia.travel.
To be honest, I tried using this site when I was booking our trek and found it kind of confusing. Since we were traveling throughout South America for seven months, we didn’t have our own camping gear and preferred to stay at either an equipped campsite or hostel bed. However, it didn’t appear that the website offered me the option to choose what kind of accommodation I wanted at each of the refugios and just kept offering campsite-only reservations. So, I wound up booking our stays directly through Las Torres and Vertice’s own websites.
Nevertheless, I know other people have found this site super helpful, so give it a try—maybe you’ll love it!
Food along the W Trek
In addition to choosing between what kind of accommodations you want along the trail, you can also opt to bring all of your own food, purchase half-board (breakfast and dinner) or full board (breakfast, lunch, and dinner) when you make your reservations at each of the refugios, or purchase food a la carte from the refugios when you’re in the park.

Signing up for meal plans at the refugios is shockingly expensive—upwards of $175 per person per day for full board.
So, Justin and I elected to bring all of our own food. On the last couple of days on the trail, we got sick of our own food, though, and started ordering the reasonably priced a la carte food from the refugios for dinner (e.g., $25 USD for a pizza that fed two or $13 for a comically enormous quesadilla that fed me for two meals). So, in hindsight, I probably would have brought slightly less food and just purchased dinner from the a la carte menus at the refugios to mix things up a bit.
Insider tip: If you do elect to bring your own food along the trail, it’s really hard (bordering on impossible) to find dehydrated hiking meals in Puerto Natales. So, unless you’re okay eating ramen for all of your meals, you might want to consider packing along and bringing some dehydrated meals from home, like this kind or this kind.
What should I do if the accommodations I want are booked up?
If the accommodations that you want are booked up for your desired dates, you can take a look at a map of the W Trek and try to stay at a nearby campground, instead—for example, Refugio Frances is a good alternative to Refugio Cuernos or some hikers opt to stay at Central as a back-up for Chileno.

Alternatively, you can do what I did and stalk the operators’ websites routinely to keep an eye out for any cancellations you can pounce on.
As a last resort, you could consider shaving off a day of the hike—a fair amount of people do this trail as a three night trek instead of the traditional four (where campers typically staying at Central the first night and Frances the second and third night). I’d really only attempt this, though, if you’re in tip-top shape!
How much does it cost to enter Torres del Paine National Park?
Once you have your accommodations squared away, you’ll need to purchase an entrance pass to Torres del Paine National Park here.
For non-Chilean residents that are over 18 years old, it costs 46,200 Chilean pesos (about $49.50 USD) for an entry pass that’s good for four days or longer.

You used to be able to purchase tickets in the park but you’re now required to buy them online at least 24 hours in advance. I’ve never heard of park entry ever selling out for a particular day, but I’d recommend booking your pass as soon as you get your accommodations squared away. One less thing to worry about!
Insider tip: Be sure to take a screenshot or download your ticket before heading to the park. There’s no cell service here, so you’re otherwise going to have a hard time pulling up your tickets to show the rangers.
Getting to and from Torres del Paine National Park
Getting to Puerto Natales
As mentioned above, you’ll first need to get to Puerto Natales to access Torres del Paine.

To get here, you can either fly into Teniente Julio Gallardo Airport, drive, or take a bus, depending on where you’re coming from during your Patagonia itinerary. For example:
- Punta Arenas, Chile to Puerto Natales (3 hours away)
- El Calafate, Argentina to Puerto Natales (6 hours and 40 minutes away)
Justin and I took a Bus-Sur from Punta Arenas to Puerto Natales and it was an affordable and generally painless experience!
Getting from Puerto Natales to Torres del Paine
Once you’re in Puerto Natales, you have to decide whether you’re hiking the trail from east to west or west to east, as you’ll need a different method of transportation, depending on where you start.
If you’re hiking east to west
You’re going to want to buy a bus ticket from Puerto Natales to Laguna Amarga ranger station in Torres del Paine, ideally on the earliest bus to give you as much hiking time for your first day on the trail. The tickets cost around 14,000 Chilean pesos ($15 USD) one-way.
If you’re going to be in Puerto Natales a few days before your hike, you can purchase tickets in person at the bus station, which makes it easier to confirm that you’re heading to the right spot in Torres del Paine. Alternatively, if you’re short on time, you can buy tickets online ahead of time. Be sure to purchase tickets at least a few days in advance and ideally more, if you’re visiting during a popular period—tickets do sell out, especially for the early morning routes!
This bus will drop you off at Laguna Amarga, where you’ll show your entrance ticket to a ranger. From here, you can either walk 7 kilometers down a long dusty road or take a Hotel Las Torres shuttle bus that waits for bus passengers to be dropped off to the W Trek trailhead at the Central district, where the main park visitor center is.
Almost all visitors take the shuttle, which costs 4,000 Chilean pesos (or $5 USD) per person, cash-only. There’s no need (or way!) to reserve these tickets ahead of time.

To leave Torres del Paine at the end of your hike, you’ll grab the ferry from the dock at Paine Grande to Pudeto across Lake Pehoe, which takes about half an hour. You used to be able to purchase ferry tickets in person, but you’re now required to buy them online ahead of time. Pricing varies depending on when you’re visiting Torres del Paine, but we paid 26,000 CLP (or $28 USD) per person.
Finally, you’ll need to grab a bus from the Pudeto terminal of Torres del Paine back to Puerto Natales (you can buy these tickets online or at the bus station). Be sure to book bus tickets, with enough time for the half hour ferry crossing and to walk from the dock to where the buses pick hikers up, which takes about 15 minutes.
If you’re hiking west to east
If you’re hiking west to east, you’ll simply reverse the steps above.
You’ll take a bus from Puerto Natales to the Pudeto terminal in Torres del Paine National Park (you’ll stop and get off at the Laguna Amarga ranger station first to show your tickets to park attendants, before reboarding and continuing on to Pudeto).

You can either buy tickets online directly through bus operators, like Bus Sur, or in person at the Puerto Natales bus station a few days ahead of time, for around 14,000 Chilean pesos (or $15 USD) one-way. Try to get the earliest bus tickets that you possibly can, so that you can maximize your time on the trail the first day.
Once you’re dropped off at Pudeto, you’ll walk to the dock and take a ferry from Pudeto to Paine Grande. You can get tickets here for around 26,000 Chilean pesos (or $28 USD) per person.

When you’re done with the W Trek, you’ll finish in the Central district, where there will be a Hotel Las Torres shuttle that will take you to the Laguna Amarga ranger station by the entrance of the national park. The shuttle costs 4,000 Chilean pesos (or $4 USD) per person (cash-only) and there’s no reason to make reservations ahead of time. Alternatively, if you’re on a shoestring budget, you can walk the 7 km down the road to Laguna Amarga.
Finally, at Laguna Amarga, you’ll catch your return bus back to Puerto Natales. You should buy tickets for your return trip at the same time as you purchase your outbound tickets.
Should you do the W Trek East to West or West to East?
As you may have noticed, whether you hike the W Trek east to west or west to east will kind of change a lot of the logistics that you’ll need to plan along the trip. So, which way is better?
Hiking the W Trek East to West
Pros
- You’ll hike up to the park’s namesake towers, Torres del Paine, which is the steepest and most challenging section of the trail, on the first day. So your legs will be nice and fresh!
- You’ll have the option to hike to the towers twice if you happen to get unlucky with cloud coverage the first time around—once in the afternoon on Day 1 and early in the morning Day 2. When we visited on the first day, the towers were totally obscured by clouds for the entire two hours that we spent at the viewpoint—but, when I hiked up to them at sunrise, I got a spectacular showing of them! Given the mileages you’ll need to tackle, you’ll have a much more difficult time doing that if you hike the trail from west to east.
- At least from our experience, WAY less people hike this route so the trail can feel less busy and congested.
- The accommodations owned by Vertice, Paine Grande and Grey, are WAY nicer than those owned by Las Torres—so you’ll get to end your accommodations experience on a high note (FYI, this only applies to the hostel aspect of the Vertice properties—I’ve actually heard the campground facilities are nicer at Las Torres).
Cons
- There’s less people that hike from east to west, so you’ll run into the same people less frequently at the refugios in the evening and, accordingly, may have a harder time making trail buddies.
Hiking W Trek West to East
Pros
- This is kind of the classic route to hike the W Trek and, if you’re lucky, you’ll end your trip with seeing the iconic towers.
- Most hikers go in this direction, so you’ll have an easier time seeing the same people every evening and making friends along the trail.

Cons
- You’ll save the steep climb up to Torres del Paine for the last day, when your legs and feet are super tired.
- As mentioned above, unless you start really early to tackle a lot of mileage on your fourth day on the trail, you likely will only have one chance to hike up to Torres del Paine on your last morning on the trail—so if you’re unlucky with cloud coverage, you’re just kind of out of luck.
- You’re ending your stay at the Las Torres properties, which, in my opinion, are definitely not as nice as the Vertice properties.
The Verdict
After doing a TON of research, Justin and I elected to hike east to west, mainly to get the steepest sections out of the way on the first day. And I’m so glad we did!

I got to have an iconic experience watching the sunrise light up the spires of Torres del Paine (which, I think, I otherwise may not have); the views, in my opinion, are better going in the east to west direction; and the trail was way less crowded than if we went in the opposite direction.
Regardless of which way you tackle it, the W Trek is inarguably one of the best hikes in Patagonia, but, in my opinion, I personally think going east to west is WAY better!
W Trek Itinerary
I’m writing this W Trek itinerary from east to west, because that’s how Justin and I hiked the trail and I just think it’s the better option.
Still, if you want to hike the trail from west to east, simply reverse the route!
Day 1: Central Sector to Refugio Chileno
- Distance: 9.0 miles (14.5 km)
- Elevation gain: 2,567 feet (782.4 m)
- Where to spend the night: Refugio Chileno
Travel from Puerto Natales to the Central Sector
Follow the steps outlined above in the Getting to and from Torres del Paine National Park to reach the trailhead at the Central Sector.
Central Sector to Refugio Chileno
The first 1.7 miles (2.7 km) of the trail are fairly flat, winding through open fields and dense shrubbery and past several campgrounds and the fancy Hotel Las Torres Patagonia.

Insider tip: If you’re not staying at Chileno this night and, instead, staying at the Central campsite or Hotel Las Torres Patagonia, I’d suggest dropping off your heavy packs there for the day before making the steep climb up to Torres del Paine.
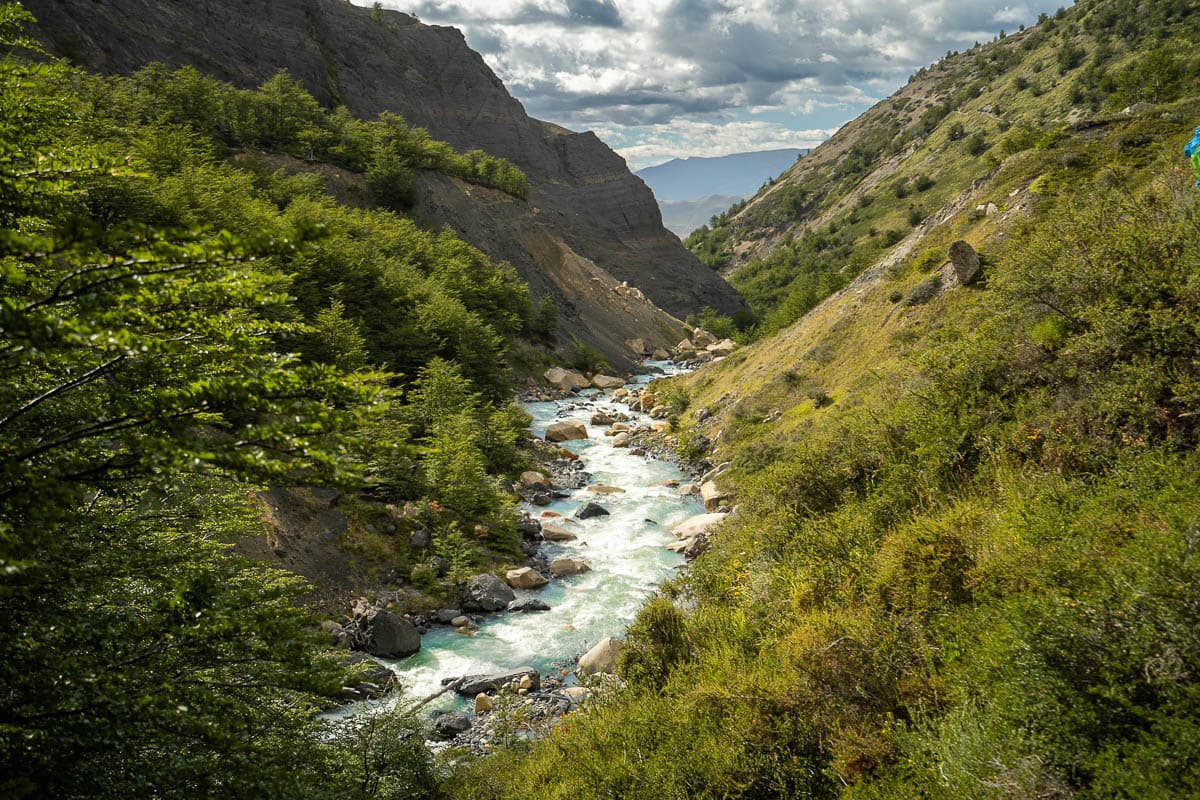
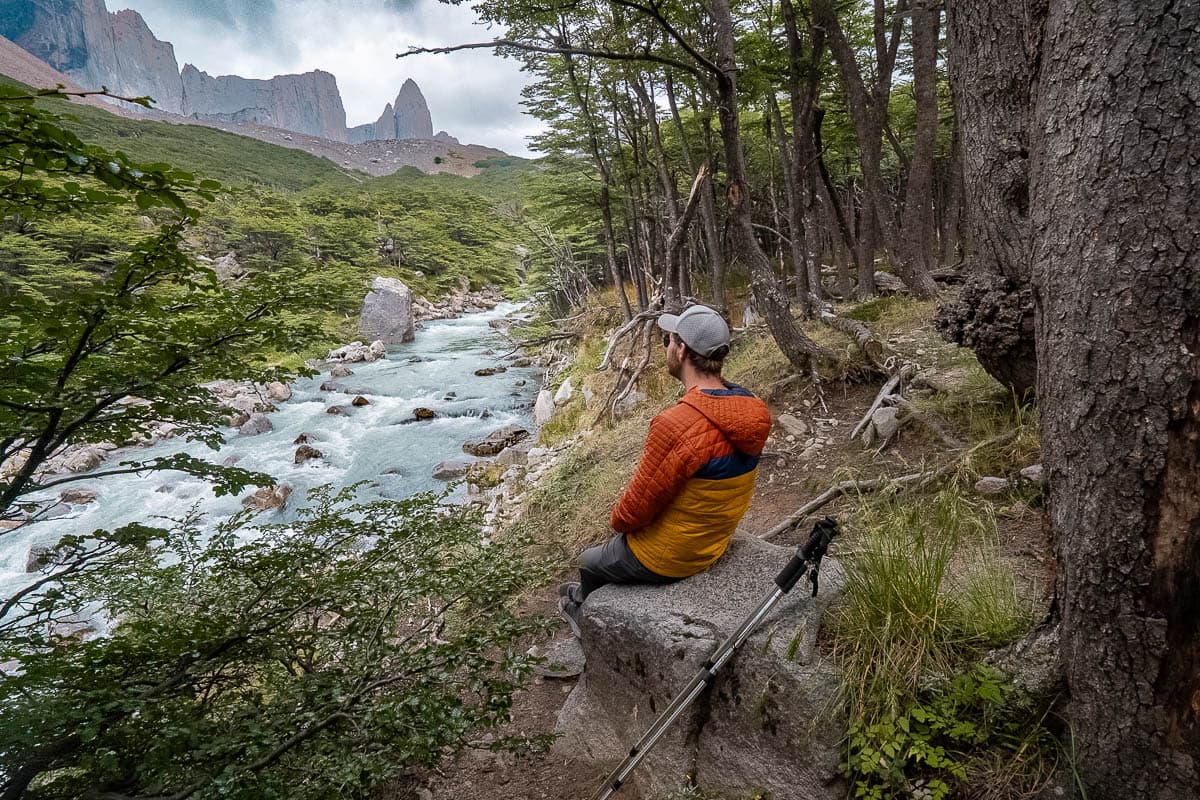
After this section, the trail starts to steeply climb up a dusty pathway for the next 1.3 miles (2.1 km), with the trail eventually following along a ridgeline overlooking a beautiful canyon, with the blue waters of Rio Ascencio running through it.
Once you’ve hiked 3.0 miles (4.8 km) into the trail, it starts to slope gently downhill until you finally reach Refugio Chileno, the closest campground to what many consider the main attraction on the trail, Torres del Paine.

This is a good spot to have an early lunch, while taking in the views of the river and the surrounding mountains, and, if you’re staying here for the night, to drop off your bags (in the back corner of the indoor dining area) before your first real challenge of the W Trek—climbing to Torres del Paine!
Insider tip: Use each of the refugios as an opportunity to refill from their potable water taps. Lots of people drink straight from the rivers and streams around Torres del Paine without filtering and swear that the water is clean and tastes great. However, I’ve heard of people getting sick from doing this—so I’d err on the side of caution and just fill up at the refugios!
Chileno Refugio to Torres del Paine
From Chileno, the path gradually climbs upward through a dense forest and past the babbling river for the next 2.6 miles (4.2 km). I had always heard that the climb up to Torres del Paine was the hardest part of the W Trek and, with such a moderate and generally pleasant hike through the woods, this section definitely lulled me into a false sense of security.

Eventually, you’ll reach a clearing, with a sign for Campamento Torres (an old CONAF campsite that has been closed for several years) and pointing up to the Mirador Base las Torres. Here is where the really challenging climbing starts.
Something that’s important to note that I never read about before actually doing the W Trek myself—many points along the trail, including this one, have cutoff times. You need to start hiking up to the towers from this point no later than 3:00 PM or the trail will be blocked off.
With that caveat in mind, in less than a mile, you’ll gain almost 1,000 feet of elevation (or 305 meters of elevation in 1.4 km), climbing over a mixture of giant boulders, huge rocky steps, and crumbly and steep scree fields. This is the only section of the W Trek that may be a bit technically challenging, with some light scrambling here or there. Just remember to go slowly and carefully—we passed two people who hurt themselves on this section, which appeared to be bad enough to prevent them from finishing the rest of the W Trek!

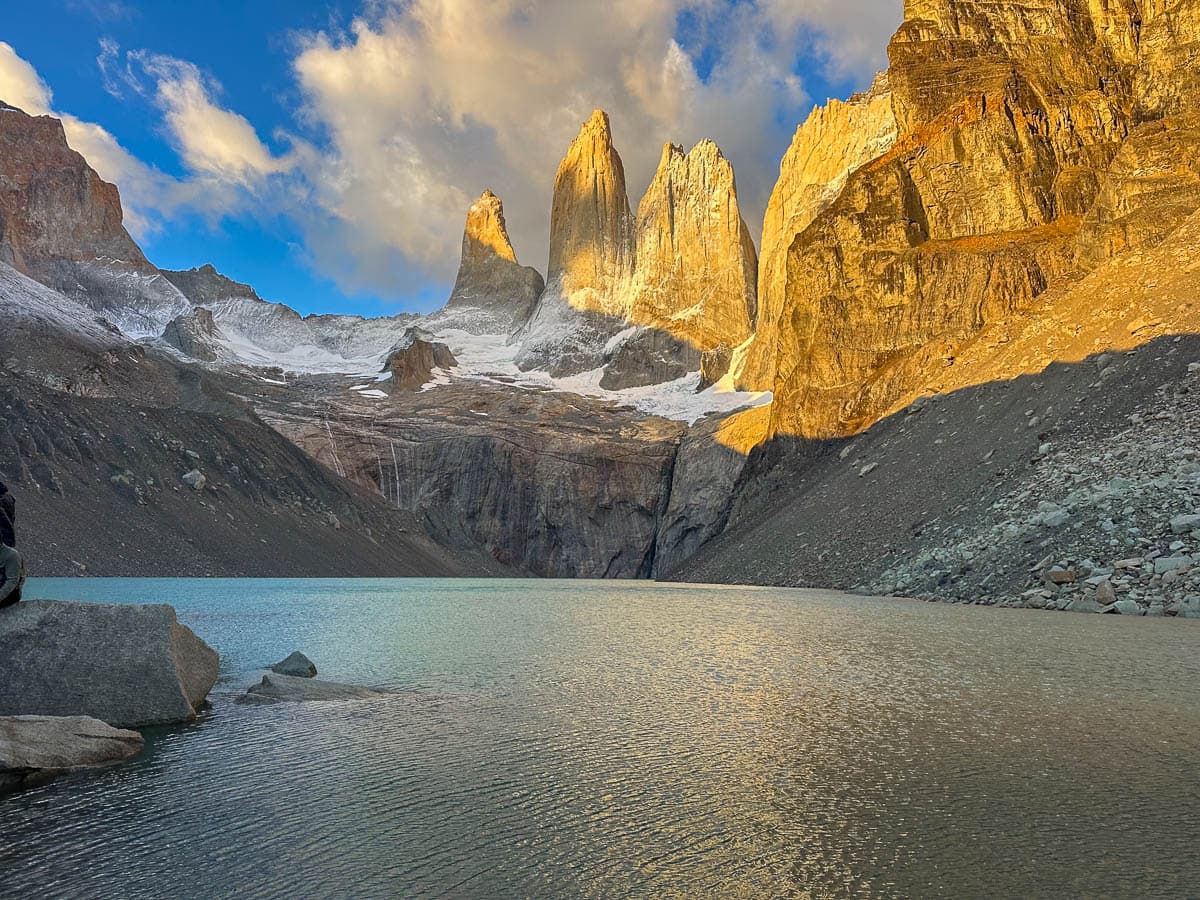
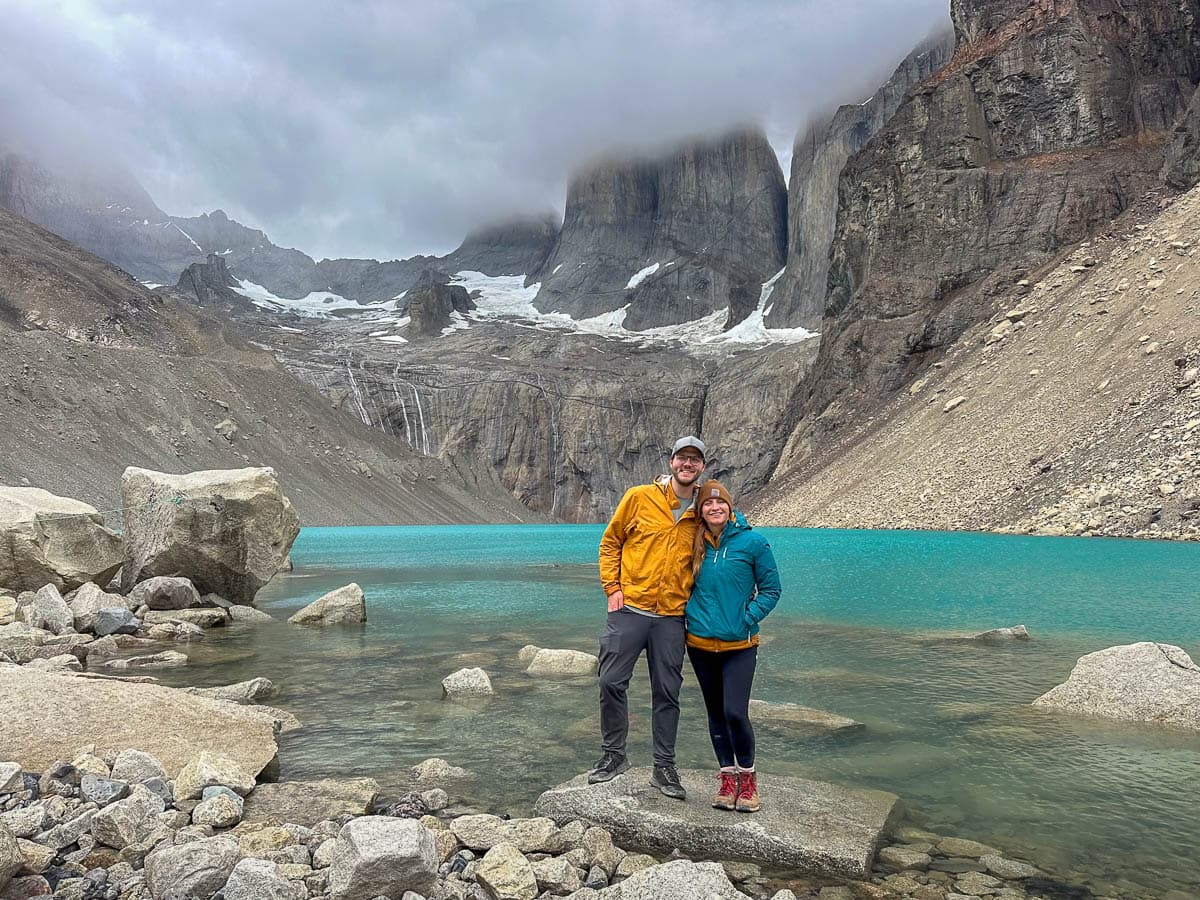
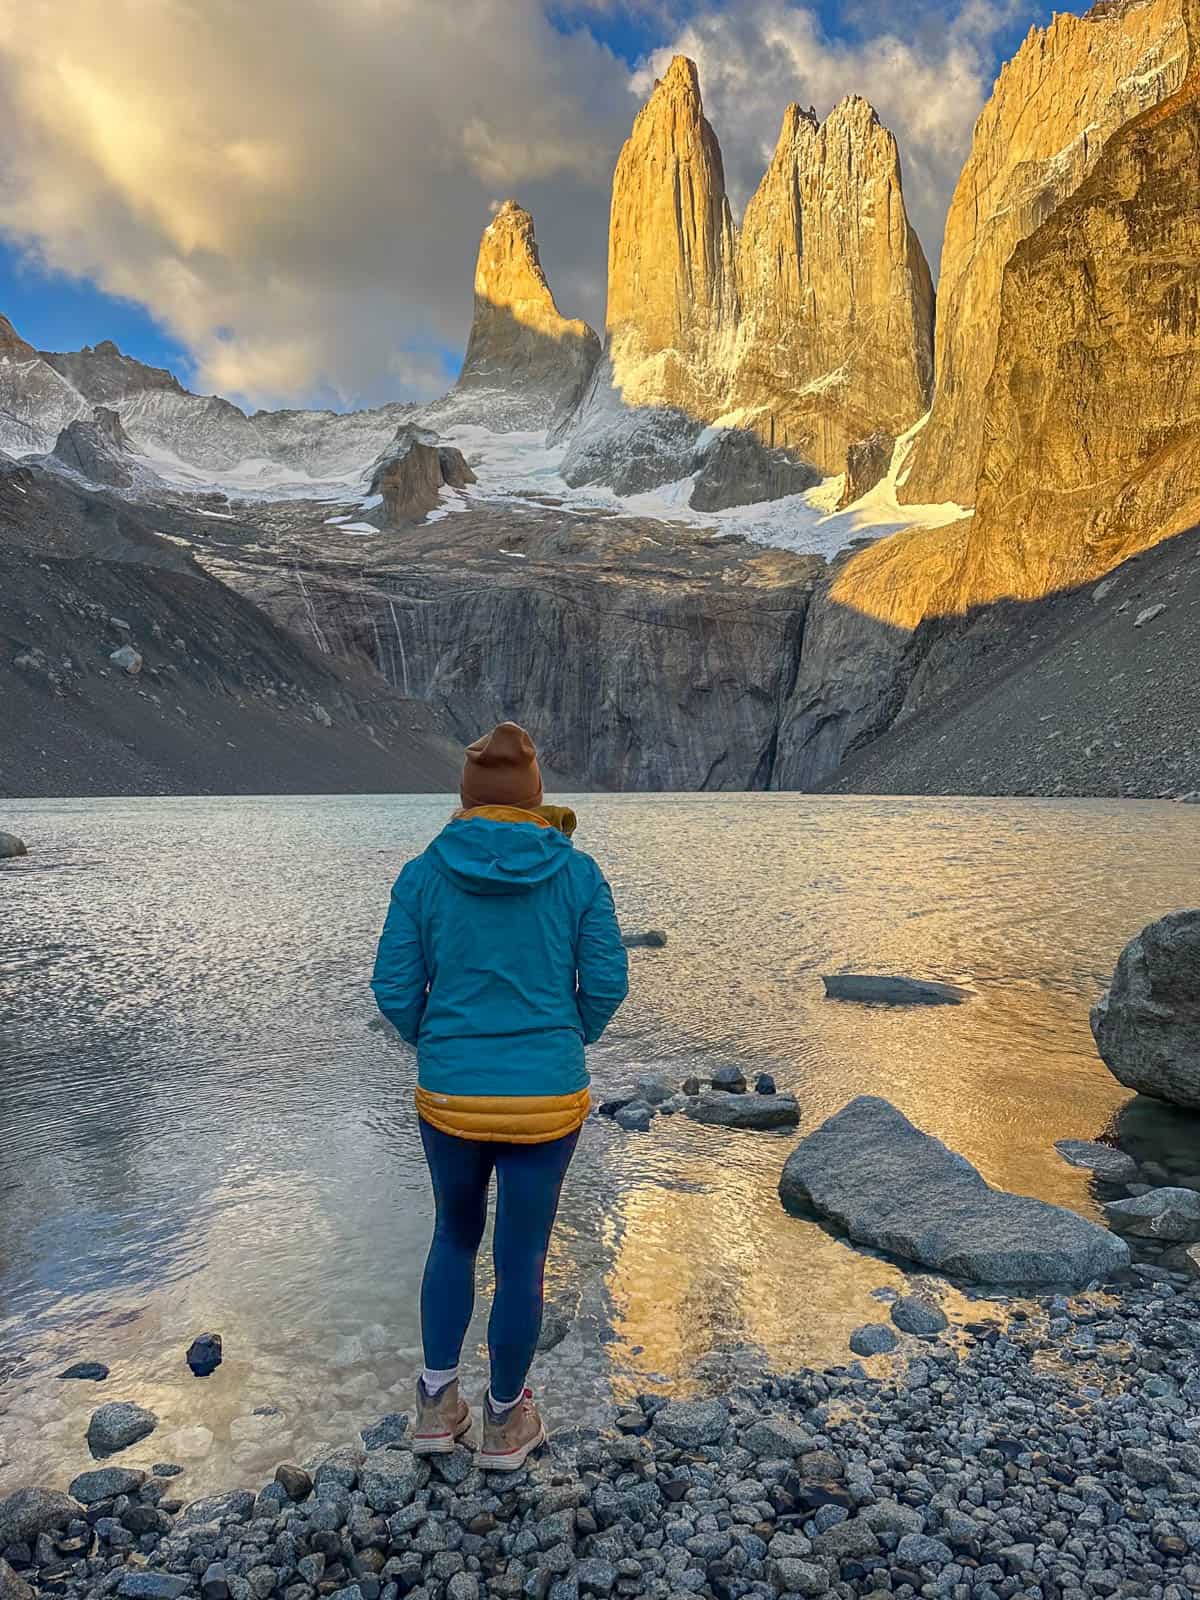
While this section seems to go on forever and ever, you’ll eventually reach the top, where you’ll be rewarded with the electric blue waters of Lago Torres and, with any luck, the iconic three spires of Torres del Paine. Keep your eyes peeled around the towers—it’s not unusual to see an Andean condor soaring here!
Plan to spend at least an hour or two at the towers, especially if you are unlucky with cloud coverage. We arrived at Lago Torres around 2:30 PM and stayed all the way until the viewpoint closed at 4:00 PM, hoping that the clouds would lift, with no luck. Even without the towers, though, this is such a beautiful place to cap off your first day!
Torres del Paine to Refugio Chileno
Once you’re done taking in the views at Torres del Paine, retrace your steps down the steep and rocky hill to Chileno. Having trekking poles is an absolute must on this section—your knees will thank you!
Chileno is on the smaller size of the refugios in the park, with individual campsites, as well as several rows of pre-assembled tents, leading up a hillside. There’s also a small cafe area, dining hall with an outdoor terrace area, and shared hot showers and bathrooms that campers are free to use.

After making it back to Chileno, we checked into our equipped tent, scarfed down our dinner, and passed out by 8 PM. I was in for an early start-time for Day 2!
Insider tip: While there's no cell service in Torres del Paine, you can purchase a Wifi service plan at each of the refugios that starts around $10 USD for one hour. Justin and I didn't use this service, so I can't vouch for the connectivity, but it's definitely handy if you need to stay connected while you're on the trail!
Day 2: Refugio Chileno to Refugio Cuernos
- Distance: 7.7 miles (12.4 km), if you don’t hike back to Torres del Paine, or 12.9 miles (20.8 km), if you do hike to Torres del Paine
- Elevation gain: 285 feet (87 m), if you don’t hike back to Torres del Paine, or 1,734 feet (528.5 m), if you hike to Torres del Paine
- Where to spend the night: Refugio Cuernos
Refugio Chileno to Torres del Paine and back to Chileno (optional)
I had my heart absolutely set on seeing the spires of Torres del Paine, so I opted to get up at 3:15 AM to hike back up to the towers for sunrise (Justin wasn’t feeling well, so he stayed back at the tent).
If you thought hiking the last stretch up to the towers was not-so-fun yesterday, buckle up to do it in the cold and the dark! Just be sure to have your headlamp good and charged—it’ll usually take at least a couple of hours to climb up to Lago Torres.
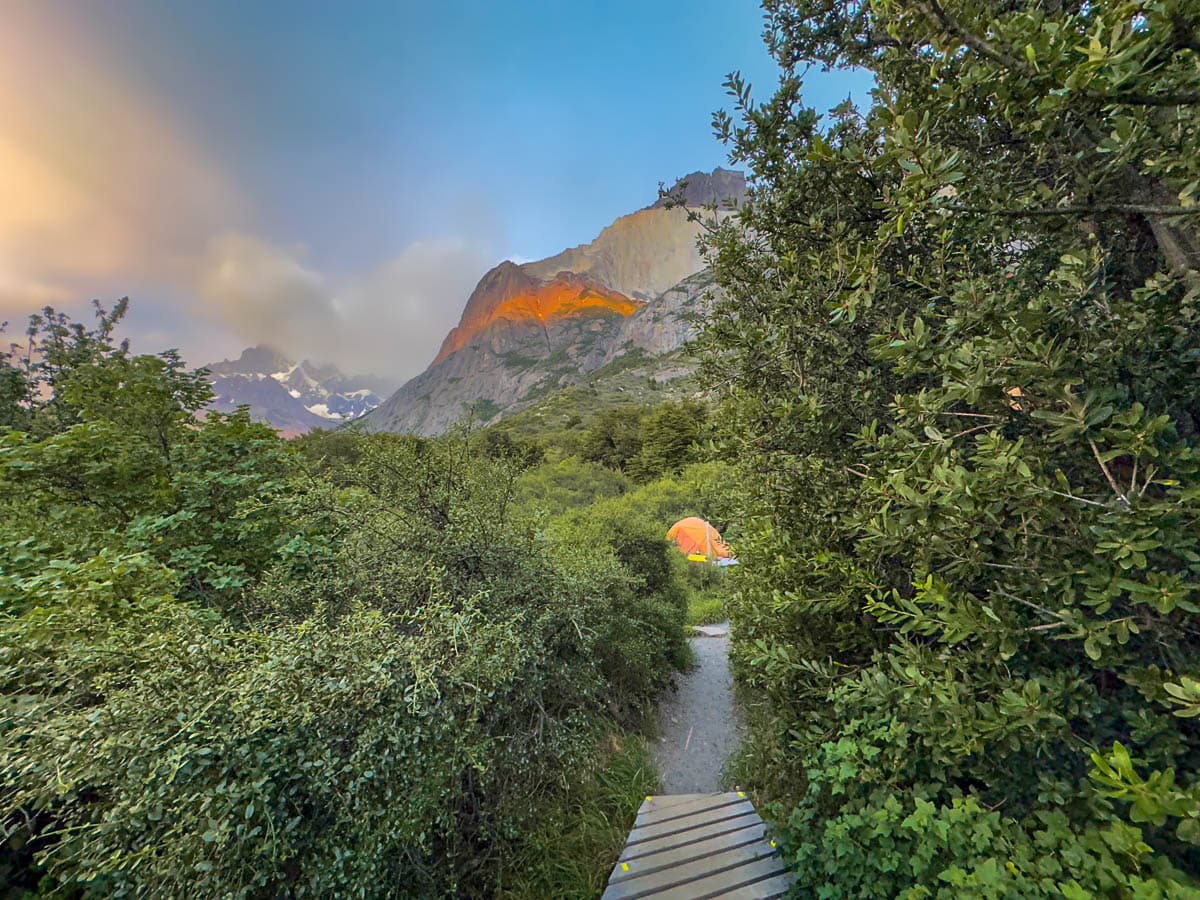
Despite the cold (and, in my case, very rainy!) climb up to the towers, it was 100% worth it for me—the spires tend to be clearer at or around sunrise and, without cloud coverage, glow a gorgeous shade of fiery gold with the rising sun.
After taking in the stunning sunrise views here, carefully make your way back to Chileno to pick up your gear and continue on your hike.
Insider tip: Hiking in the dark is technically not allowed anywhere in Torres del Paine National Park, including to Torres del Paine for sunrise. For what it’s worth, this rule doesn’t seem to be enforced in any way, shape, or form here—there were easily 50+ hikers at the base of the towers while I was watching the sunrise here. Still, to fully comply with the park’s rules, you should wait until there’s some light on the trail before setting off from Chileno. We passed one poor guy who had tripped on this section and broke his arm during the day, so this rule likely exists for a good reason.
Refugio Chileno to Refugio Cuernos
Good news—the rest of your hike today is mostly downhill, stunningly beautiful, and generally pretty easy!
Justin was nice enough to pack up all our gear by the time I got back from my sunrise excursion up to Torres del Paine, so we quickly ate breakfast and hit the trail, making our way back towards the Central sector.
About a mile downhill from Chileno, the trail will fork—the path to the left heads back to Central, but we’re going to take the trail that leads downhill, off to the right (westward).
Given that the Mirador Base las Torres trail is extremely popular with day hikers from Puerto Natales, this portion of the trail is MUCH less busy than what you’ll experience on Day 1, allowing you to simply enjoy the stunning surrounding views.
The trail crosses several open fields, with an enormous wall of dramatic mountains on your right and, to your left, the stunning turquoise waters of Nordenskjöld Lake. Most of the time, when I hear people talking about this national park, it’s often about the towers or its other dramatic mountainscapes—I was not prepared for how STUNNING the glacial lakes are!
There are a few challenges along this section of the trail—there’s a boggy area that tends to get quite muddy and a few steep climbs. However, this day is definitely a welcome reprieve from all the elevation gain of yesterday!

Once you’re around 16.6 miles into your hike, you’ll see Cuernos tucked into the woods across a rushing river. You’ll climb down steep and rocky steps and cross a bridge overlooking a beautiful waterfall before approaching the buildings and campground of Cuernos.
Cuernos is a pretty large facility, with a hostel with several dorm rooms, a dining room and terrace, campground with equipped and empty campsites, and even private cabins that you can rent. Justin and I checked into our hostel dorm rooms, took a gloriously hot shower, made our dinner, and passed out by 8 PM.
Insider tip: If you don’t think you’ll wake up for sunrise at Torres del Paine or you just prefer to squeeze in more mileage on Day 2, you might want to consider staying at Refugio Frances instead. It’ll add an extra two miles and 360 feet of elevation gain to your hike, but that just means you’ll have less to do on Day 3, which is otherwise a very long day!
Day 3: Refugio Cuernos to Refugio Paine Grande
- Distance: 14.7 miles (23.7 km)
- Elevation gain: 2,437 feet (742.8 m)
- Where to spend the night: Refugio Paine Grande
Refugio Cuernos to Campamento Italiano
This is going to be your longest day on the trail, so I’d strongly suggest waking up bright and early, having a quick breakfast, and hitting the trail no later than 7 AM.

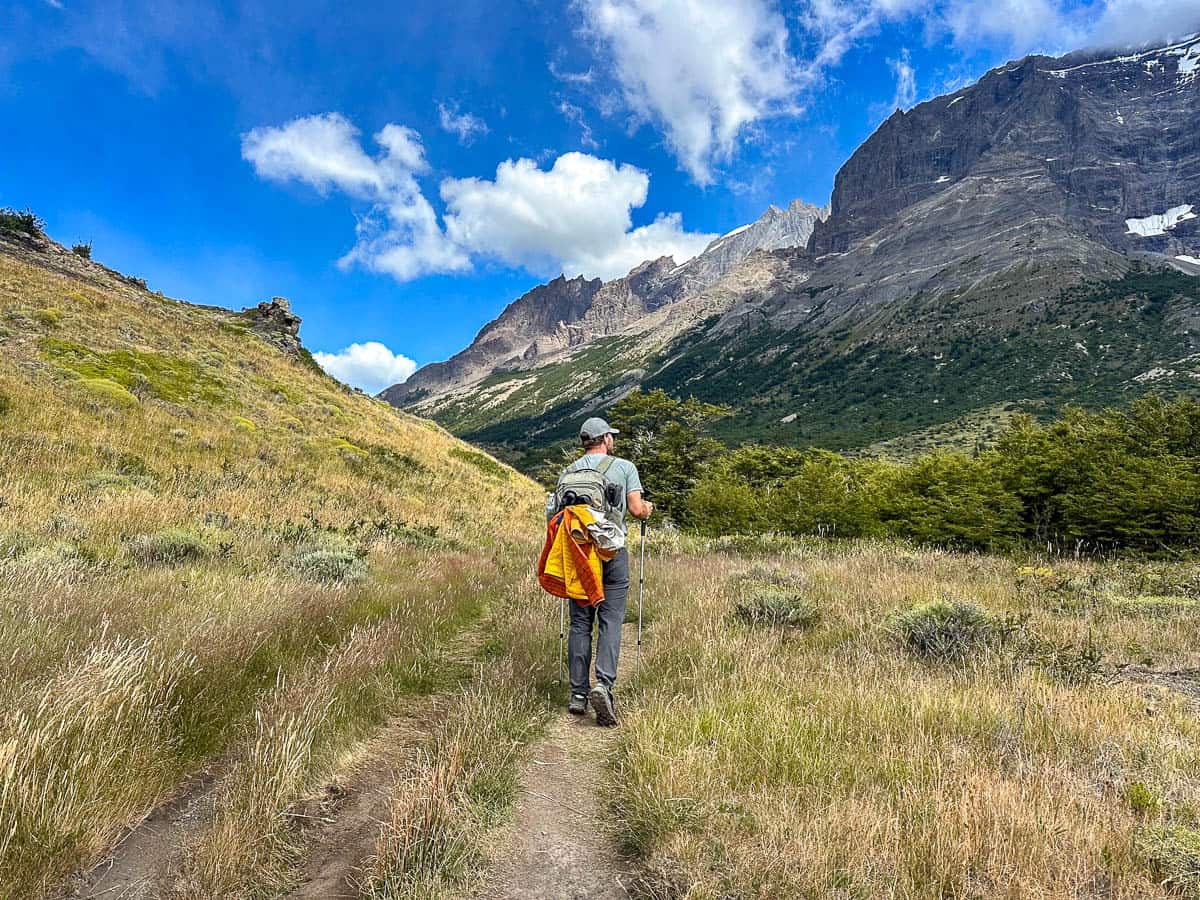
This section of the trail has a pretty gentle incline and doesn’t compare with the butt-kicking climb of Day 1. Still, the trail is mostly lined with tiny boulders that shift around and are seemingly trying to break your ankles—so be careful! Along the way, you’ll skirt along the shore of Nordenskjöld Lake, which is ABSOLUTELY stunning—when we hiked here, we even saw a double rainbow!
After about two miles (3.2 km), you’ll hit Camping Frances, a fairly large campground with lots of tent platforms, one of the nicest bathrooms in all of Torres del Paine, and a small coffee shop/market if you’re in need of a pick-me-up. Make a quick stop if you need to and then press on for about 0.8 miles (1.3 km).
As you hike through the woods, the slopes of Paine Grande, topped with the blue ice of the French Glacier, will tower above you.

Soon, you’ll reach Campamento Italiano, a rustic campground that was once operated by the national park. While you can no longer stay at the campground, you can drop off your heavy packs here before continuing on to your largest challenge of the day—hiking up to Mirador Británico.
Campamento Italiano to Mirador Británico
From Italiano, the trail starts relatively flat, winding through a forest, but within half a mile (0.8 km), the forest clears and you’ll already be at Mirador del Glaciar Francés. Here, you’ll have spectacular views of the French Glacier draped on the side of the Paine Grande mountain and a front row seat to the thundering avalanches that seem to happen on its slopes every five minutes or so.

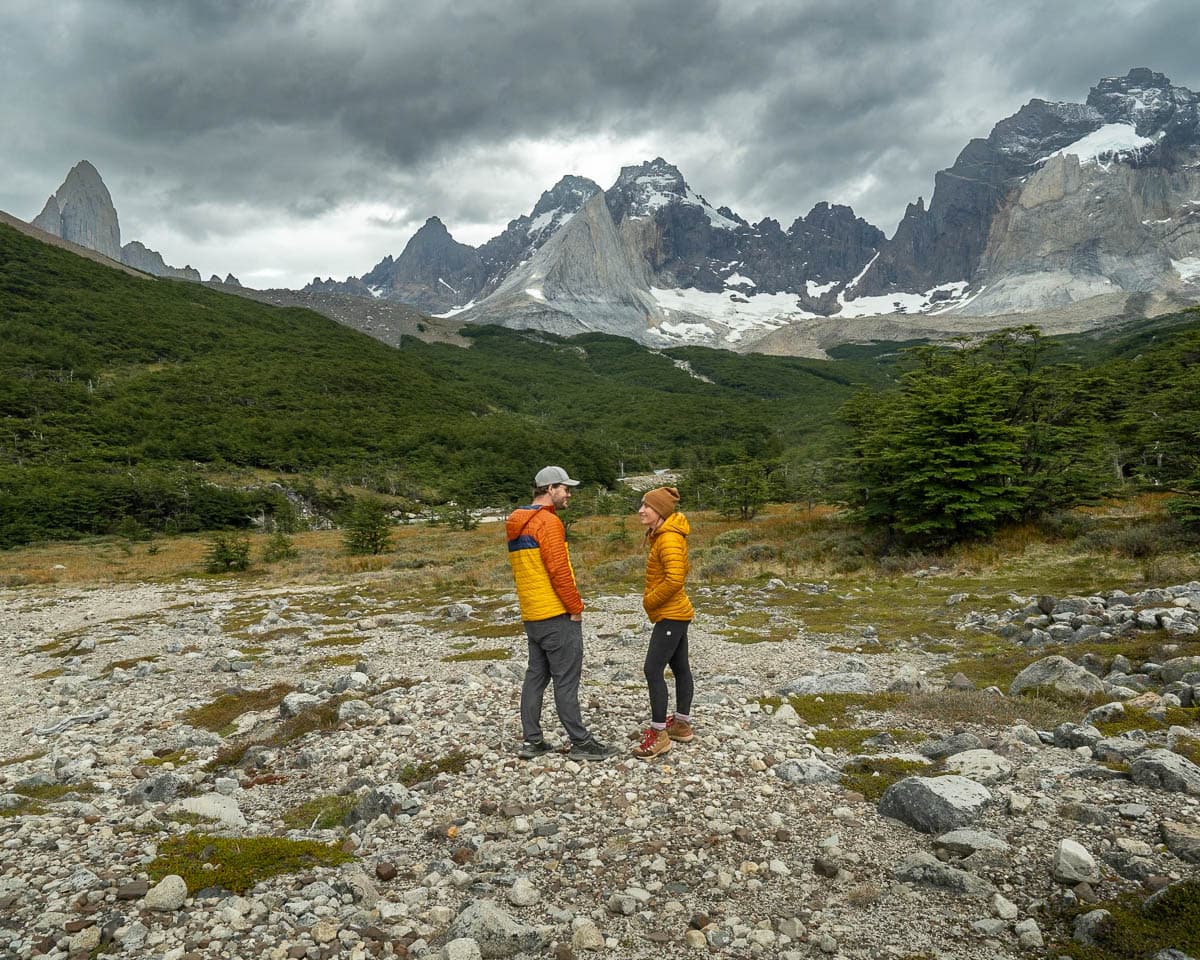
The incline continues to get steeper from here, climbing along a rocky, crumbly slope through a forest, until, about a mile (1.6 km) later, you’ll reach a clearing with a viewpoint of Valle de Francés. This is one of the best views along the W Trek—which is saying a lot! You have a birds eye view of Nordenskjöld Lake to the south, the French Glacier to the west, and the iconically jagged mountain peaks of the Cordillera Paine range to the north and the east.
Many hikers who aren’t up to hike the full length of the trail on Day 3 opt to turn around here, but if you’ve got some energy, I’d suggest pressing on—Mirador Británico is totally worth it, in my opinion! In fact, it was Justin’s favorite viewpoint during the entire hike.
From here, the gradual two-mile (3.2 km) climb up to Británico is mostly through a densely wooded forest and along the rushing waters of Rio del Francés, with a few clearings that provide jaw-dropping views of the surrounding mountains. You’ll definitely have to work for it for the final push up to Británico—the last 0.4 miles up is STEEP.

It’s worth it, though—the view of the rugged peaks and spires of the surrounding mountains is absolutely stunning. Find a rocky ledge to relax on and enjoy a snack or lunch while drinking in the epic views.
Mirador Británico to Campamento Italiano
Carefully retrace your steps back to Italiano. We didn’t feel like the climb up to Británico was too steep but our knees DEFINITELY felt the incline on the way back down—again, trekking poles are definitely your friend here.
There’s a (not very well-maintained) bathroom at Italiano you can use before picking up your pack and hitting the trail again towards your final stop of the day—Paine Grande.
Campamento Italiano to Refugio Paine Grande
Thankfully, most of the rest of the 4.8 miles (7.7 km) from Italiano to Paine Grande is quite flat, with a handful of wooden boardwalks and some gentle slopes up and down.

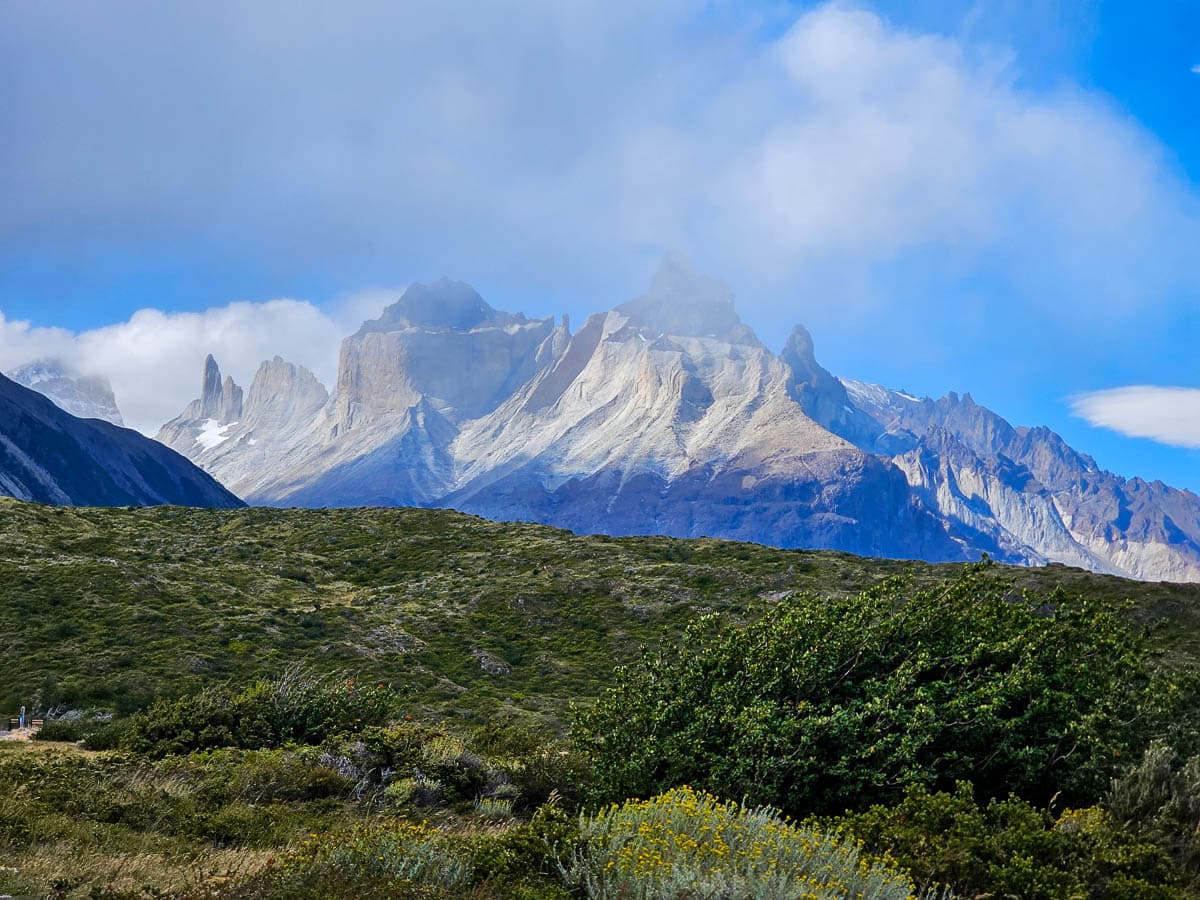
Along the way, you’ll skirt the edges of Lago Skottsberg, which perfectly reflects the peaks of the two-toned behemoth, Cuernos del Paine. Even though your feet will be absolutely screaming by now, be sure to take a moment, turn around, and enjoy the views here!
Once you’re about 4.4 miles (7.1 miles) past Italiano, you’ll reach the shores of the electric blue waters of Lake Pehoe and, in the distance, you’ll be able to make out the colorful tents along the hillside by Refugio Paine Grande.
My feet were absolutely wrecked by this point, but we hobbled our way the final stretch to the refugio.
Paine Grande is where most hikers start the W Trek and the O Trek (a longer loop around Torres del Paine), as well as hosting visitors who are just doing shorter day hikes. Accordingly, this is by far the biggest and busiest property, with a huge campground, dining hall with a terrace, market, and hostel.

Justin and I stayed in a hostel bed here and, I will say, if you’re going to splash out for a hostel bed any night that you’re on the W Trek, DEFINITELY make it here.
Many of the hostel rooms are private accommodations for two, with a small table, lockers to keep your gear, and an electrical outlet—it was BY FAR the nicest refugio we stayed at in Torres del Paine. Plus, there’s two lovely wood-burning fireplaces and a lounge area with panoramic windows that hostel guests get to cozy up to. And, weirdly enough, I’ve heard that the campground facilities here are arguably some of the most basic in the park!

We were SO pooped after our day of hiking that we bought the aforementioned comically enormous quesadilla for dinner and passed out for the night.
Day 4: Refugio Paine Grande to Refugio Grey
- Distance: 7 miles (11.3 km) or 11 miles (17.7 km), if you hike to the second suspension bridge over Glacier Grey
- Elevation gain: 692 feet (211 meters)
- Where to spend the night: Refugio Grey
Refugio Paine Grande to Refugio Grey
This was one of our shortest and easiest days on the trail, so we had a pretty lazy morning at Paine Grande, having a leisurely morning shower and hitting the trail by 9:30 AM, when you’re required to check out of the refugio.
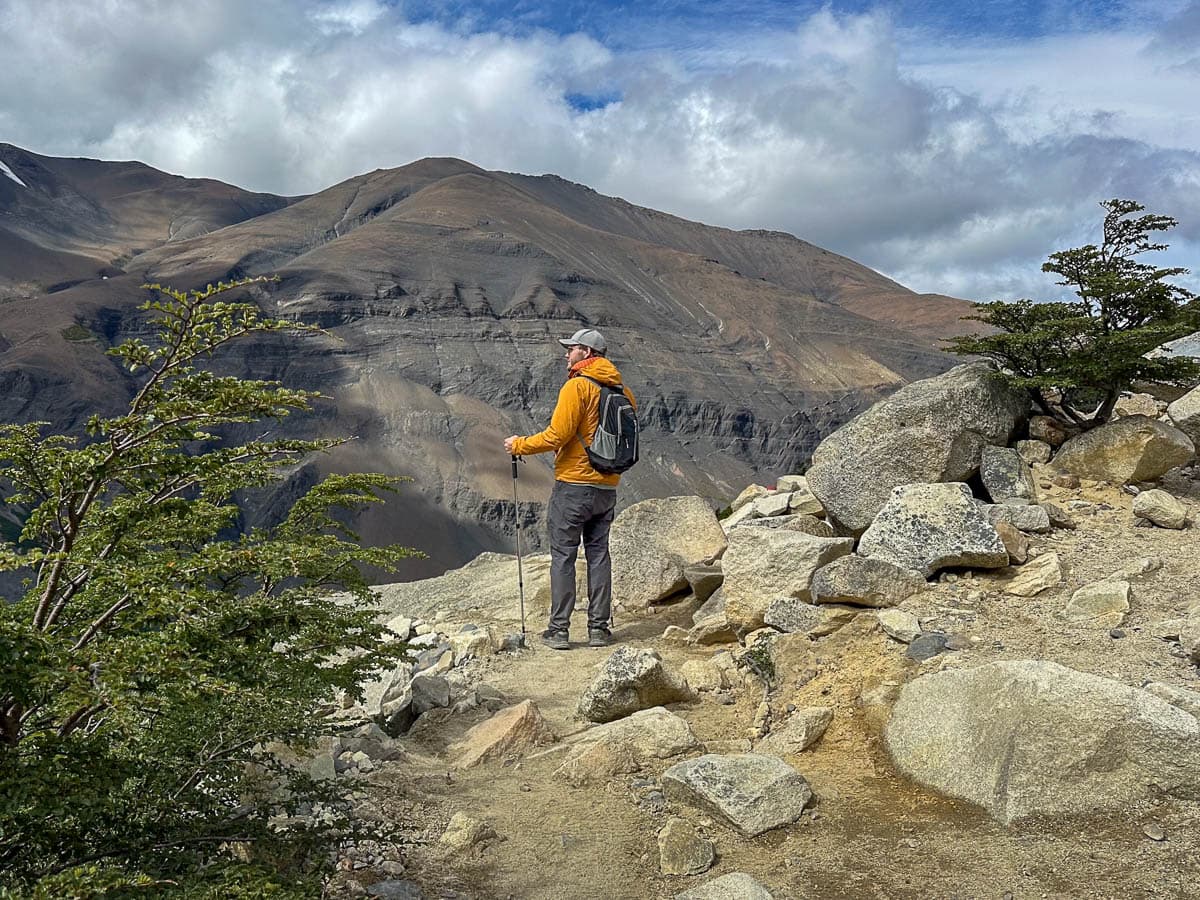
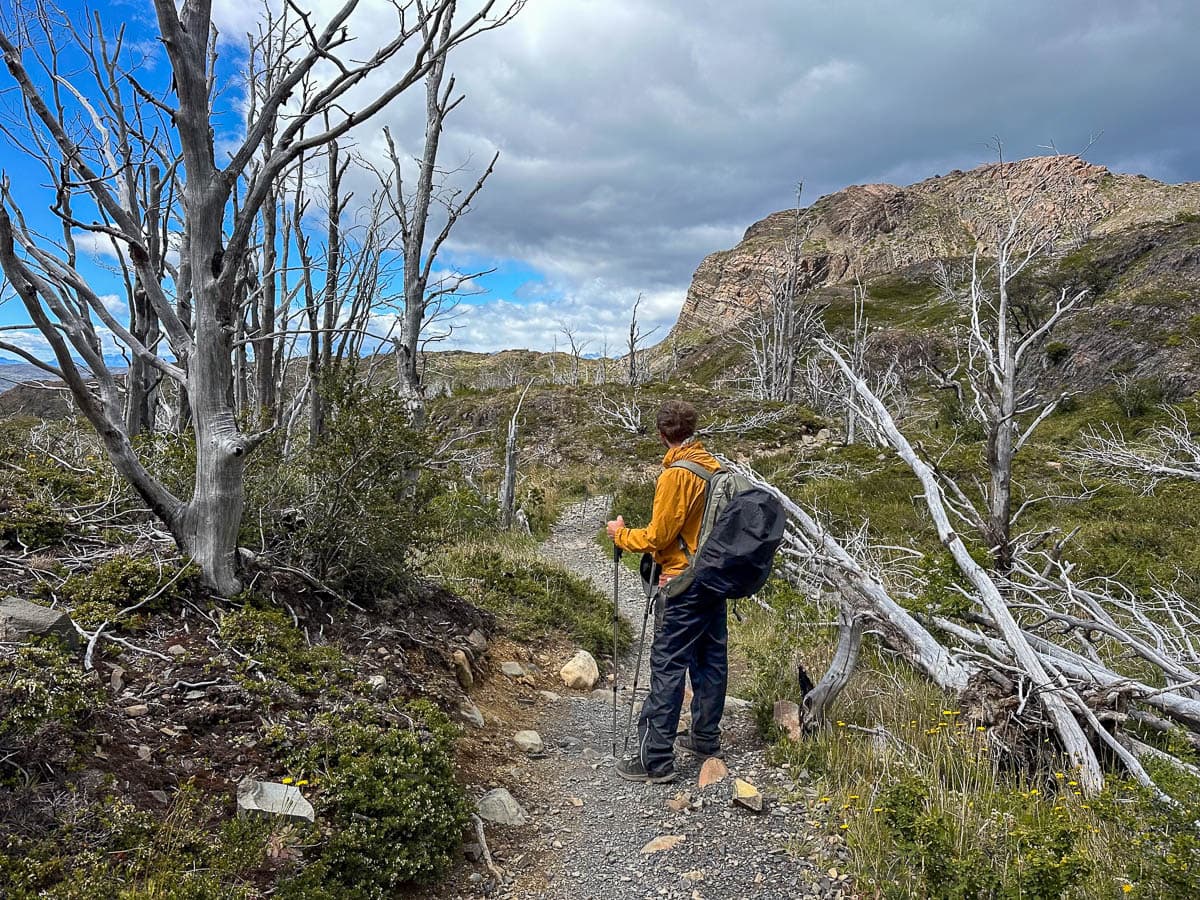
The trail climbs through a rugged canyon with lush greenery—it’s still beautiful, but not quite as dramatic as the epic landscapes of the previous days hiking. Additionally, as compared to Day 3, you might notice the trail is a bit busier (although nothing compared to the hike up to the Mirador Base las Torres!)—it’s not uncommon for day trippers to try to tackle the Glacier Grey hike in one day.

After about 2.5 miles (4 km), you’ll reach a rocky hillside which provides your first glimpse of the milky waters of Lago Grey, dotted with bright blue icebergs from the nearby glacier.
Continuing on for another mile or so, you’ll reach Mirador Lago Grey, where you’ll get to enjoy views of the hulking blue ice of the massive Glacier Grey, an ancient sheet of ice that sprawls a whopping 17 square miles. There’s some rocky outcroppings here that may be a nice place to take a breather or a snack break if the weather is good, but, whenever we passed this point on the trail, it felt like the wind was about to carry us away.

Shortly past this point, you’ll reach a section of an incredibly steep cliffside you’ll need to scramble down, with extremely shallow footholds. Be super careful here—it was wet and slippery when we visited and would be incredibly easy to fall here.
Once you safely make it down this section, though, it’s a pretty flat hike to Refugio Grey, a property with a fairly small mountain hostel and decently sized campground.
Refugio Grey to Mirador Grey
Drop your packs off at Refugio Grey and head to your last official stop on the W Trek, Mirador Grey. Past Refugio Grey, it’s a 0.5 mile (0.8 km) gentle climb to a rocky ledge, which provides a beautiful vista of Lago Grey and the massive glacier that feeds it.

As you hike here, keep an eye out for hikers coming the opposite way—more likely than not, they’re hikers that are SO close to completing the O Trek, a 73.5 mile (118 km) loop around Torres del Paine National Park. Kindly give them the right of way—they’re very tired and so close to victory at this point!
Refugio Grey to the Suspension Bridges (optional)
If you’re up for even more of an adventure, you can continue on along part of the O Trek towards the Paso Ranger Station to cross two suspension bridges with incredible views of Glacier Grey.
If you decide to hike to both suspension bridges, it’ll add 3.6 miles (5.8 km) roundtrip (back to Refugio Grey) and quite a lot of elevation gain, so I’d only recommend making the trek if you have plenty of energy and daylight left.

However, the first suspension bridge is just five or so minutes up the trail from Mirador Grey and absolutely worth the detour! We didn’t feel up to hiking to both of the bridges, but made the short climb to the first one—and it was one of our favorite parts of the W Trek!
Suspension Bridges to Refugio Grey
Regardless of whether you hike to both of the suspension bridges or none of them, retrace your footsteps back to Refugio Grey.
This property has a campground, a nice mountain hostel (with another wood-burning fireplace that a bunch of guests dried their boots by!), a restaurant and bar, and a small market area. This was also the only refugio that we stayed at that provided soap in the showers—fancy!

Insider tip: This is the only refugio that we stayed at that did not provide hot water for cooking, which we and other campers needed to make our dehydrated food. We took this as a sign that we should get pizza and beer for the night, but, if you’re on a super tight budget, you may want to consider bringing food that doesn’t require any hot water for your time at Grey.
Day 5: Refugio Grey to Refugio Paine Grande
- Distance: 6.4 miles (10.3 km)
- Elevation gain: 527 feet (160.6 m)
- Where to spend the night: Back in Puerto Natales!
Refugio Grey to Refugio Paine Grande
We booked the 5 PM ferry from Paine Grande to Pudeto, so we weren’t in any rush to leave Refugio Grey in the morning. However, if you book an earlier ferry (there’s one that typically leaves around 11:20 AM), I’d suggest getting up bright and early and hitting the trail by no later than 7 AM.
After a leisurely shower and breakfast in the morning, we retraced our steps back to Paine Grande. For some reason, this hike felt quite a bit shorter and easier than the previous day. We had anticipated being excited and ready to get back to a consistent bed routine and meals that didn’t largely depend on dehydrated foods—but we were actually quite sad to be nearing the end of the W Trek!
Insider tip: If you're hoping to do any glacier trekking or glacier kayaking while you're in Patagonia, you might want to consider doing that this morning, as activities around Glacier Grey are WAY more affordable than many of the other glaciers in the area. For example, glacier trekking tours at the nearby Perito Moreno glacier can cost as much as $1000 USD per person (and sometimes even more!).

So, if you want to get up close and personal with a glacier without emptying your 401k, consider going on an adventure around Glacier Grey, like this kayaking tour and this glacier trekking tour, both of which meet right by Refugio Grey.
We made it back to Paine Grande in about three and a half hours after leaving Refugio Grey and spent the rest of the afternoon, drinking a celebratory beer and lounging by the fire as we awaited our ferry across Lake Pehoe.
I’d recommend lining up at the dock next to Paine Grande about 45 minutes before your ferry is supposed to depart—we waited until about 15 minutes beforehand and weren’t able to score seats, which our tired feet and legs weren’t too happy about. And if you luck out with a nice day, try to snatch a seat outside to take in your last views of the Cordillera Paine mountains.
We were glad we booked the afternoon ferry, as it was nice not to be rushed along the trail. However, if you book the same time as we did, be prepared for a late night! We got back to Puerto Natales around 10 PM—but were thankfully able to pop by a restaurant that was open late for a much deserved burger and fries!
Insider tip: Many of the buses, including ours, have a significant gap of time between when the ferry drops you off in Pudeto and when the buses actually depart.

Luckily, there’s a small cafe with coffee, beer, and snacks (all of the essentials) just a short walk from the dock which you can hang out at until closer to your bus’ departure time.
When to hike the W Trek
The best time to hike the W Trek is from October through April, when the campgrounds and refugios are open for the season and there’s limited ice and snow on the trail.
For the best weather, I’d suggest visiting from December through March—while the weather in Patagonia is always unpredictable, you’ll have the best chance of warmer temperatures and clearer skies during this period of time. Justin and I hiked the trail in mid-January and, while we experienced a bit of rain on the trail, we overall had absolutely lovely weather.
Torres del Paine National Park is open year round, so while you can theoretically hike the W Trek at anytime, you are required to have a guide with you in the winter months of May through September. Additionally, I would be prepared to not be able to access everything on the trek—certain parts of the trail at higher elevation, like the viewpoint for the towers or Mirador Británico, may be inaccessible due to heavy (or potentially dangerous!) snowfall.
Insider tip: Regardless of what season you're planning your Chile itinerary, the weather in Patagonia is famously unpredictable—and most weather forecast sites are pretty inaccurate around Torres del Paine. The best site to refer to Wind Guru, which has a pretty granular breakdown of various areas of the park, like Refugio Grey or Mirador Base Torres.
What to Pack for the W Trek
What you need to pack for the W Trek will depend on whether you’re staying in equipped tents or hostels or using your own camping gear and making your own food. We actually wrote a whole W Trek packing list guide, with everything you need to bring with you on the trail, broken down according to what kind of trek you’re doing, but here are the basics:
Essentials for all W Trek hikers
Clothing
- Warm puffer coat
- Raincoat (for men and for women)
- Rain pants (for men and for women)
- Waterproof hiking boots (for men and for women)
- Hiking sandals to wear around camp (for men and for women)

Accessories
- Beanie
- Baseball hat
- Sunglasses
- Gloves, if you plan on doing sunrise at Torres del Paine (for men and for women)
Gear
- Large Nalgene bottle
- Rechargeable headlamp
- Smaller daypacks to bring essentials on hikes when you leave your bigger packs at a refugio
- Rainfly
- Trekking poles
- Snacks, like Clif bars or trail mix
- Travel towel
- Earplugs
- Sleep mask
- First aid kit
- Poop kit, with toilet paper, lightweight trowel, and Ziploc baggies—there’s toilets at all of the refugios and campgrounds, but you should come prepared, in case nature calls along the trail
Toiletries
- Sunscreen
- Hand sanitizer
- Toothbrush and toothpaste
- Deodorant
- Shampoo
- Soap (the only refugio whose showers has soap is Grey)
- Any medication you might need
Electronics
- Camera
- Tripod
- Cell phone
- Battery pack
- Charging cables
- Universal travel adapter plug (pssst… if you’re from the United States, our plugs aren’t compatible in Chile!)
- Headphones
Miscellaneous
- Passport and Chilean tourist card that you get when you enter the country: Without it, you’ll wind up paying 20% more tax on campgrounds and refugios, so this is SUPER important to have!
- Screenshots of your Torres del Paine entry ticket and your tickets for the buses and ferry
- Cash and credit cards—pretty much everywhere, but for the shuttle from Laguna Amarga to Central, takes credit cards
- Gallon baggies and baggies—there’s a few places where you can dispose of your trash, but you’ll generally need bags to pack out everything you pack in
Essentials for W Trek hikers that are camping
- Tent
- Tent anchor pegs, as several of the tent sites in the park are on raised wooden platforms and you won’t be able to use the stakes that come with your tent
- Sleeping pad, with an R-value of 4.0 or higher
- Sleeping bag, rated for at least 5° Celsius or lower
- Inflatable pillow
Essentials for W Trek hikers that are making their own food
- Lightweight, dehydrated meals for five days (or less, if you supplement with food from the refugios)
- Instant coffee
- Cookware, like this cookset
- Camping sporks
Insider tip: As noted above, all of the refugios, other than Grey, have hot water that you can use for cooking, but if you need to heat something up other than water, don’t forget your campstove, including a burner, gas canister, and lighter. Campstoves are typically only allowed in authorized cooking areas of the refugios or campsites to prevent wildfires.
Phew—that’s everything you need to know about to plan your time on the W Trek, the best hike in Patagonia. Do you have any questions about planning this epic adventure? Let us know in the comments below!
